


What will happen, if one day, you’ve no access to your phone? Okay, maybe you can manage without it for a day or two. Maybe you can go without scrolling through reels all day and downloading them to your phone. But, what will an Instagram influencer or content creator lose access to their phone temporarily? How are they going to post content for their social audience in a situation like this? Luckily, there’s an excellent workaround for a situation as such. Keep scrolling through this article and you’ll know how to post on Instagram from PC!
Instagram rewards consistency, a steady supply of content (reels, stories, photos, etc) in the form of more followers, and increased engagement. Heck, people even earn money through Instagram reels! But, the prerequisite for that is you stay consistent with your content. And losing access to your phone is certainly not the way to go. But knowing how to edit a post on Instagram from PC is going to help in keeping your content game up and running.
But, I bet you’re curious to know how to post on Instagram from PC in greater detail. In fact, knowing how to edit Instagram post on computer will make you more productive! No more having to depend on a single device or having to glare on a small screen to produce content for the gram!
Table of Contents
How To Post On Instagram From PC? Not One But Eight Methods To Help You Out!
Uploading content on Instagram from a PC or Mac system is not as tough as it looks. Follow our easy step-by-step guides below that will easily take you through the different methods that you can use to edit Instagram post on computer and even post them on Instagram using the same.
Method 1: How to Post On Instagram Using A Laptop | Simple Steps To Get The Work Done!
First things first, you need to have Google Chrome on your laptop or desktop to post pictures and videos on Instagram. If you don’t have Chrome installed, download it using the browser.
After installing Chrome, follow these simple steps to post on Instagram:
- Open the Instagram login page on your browser and enter your valid credentials
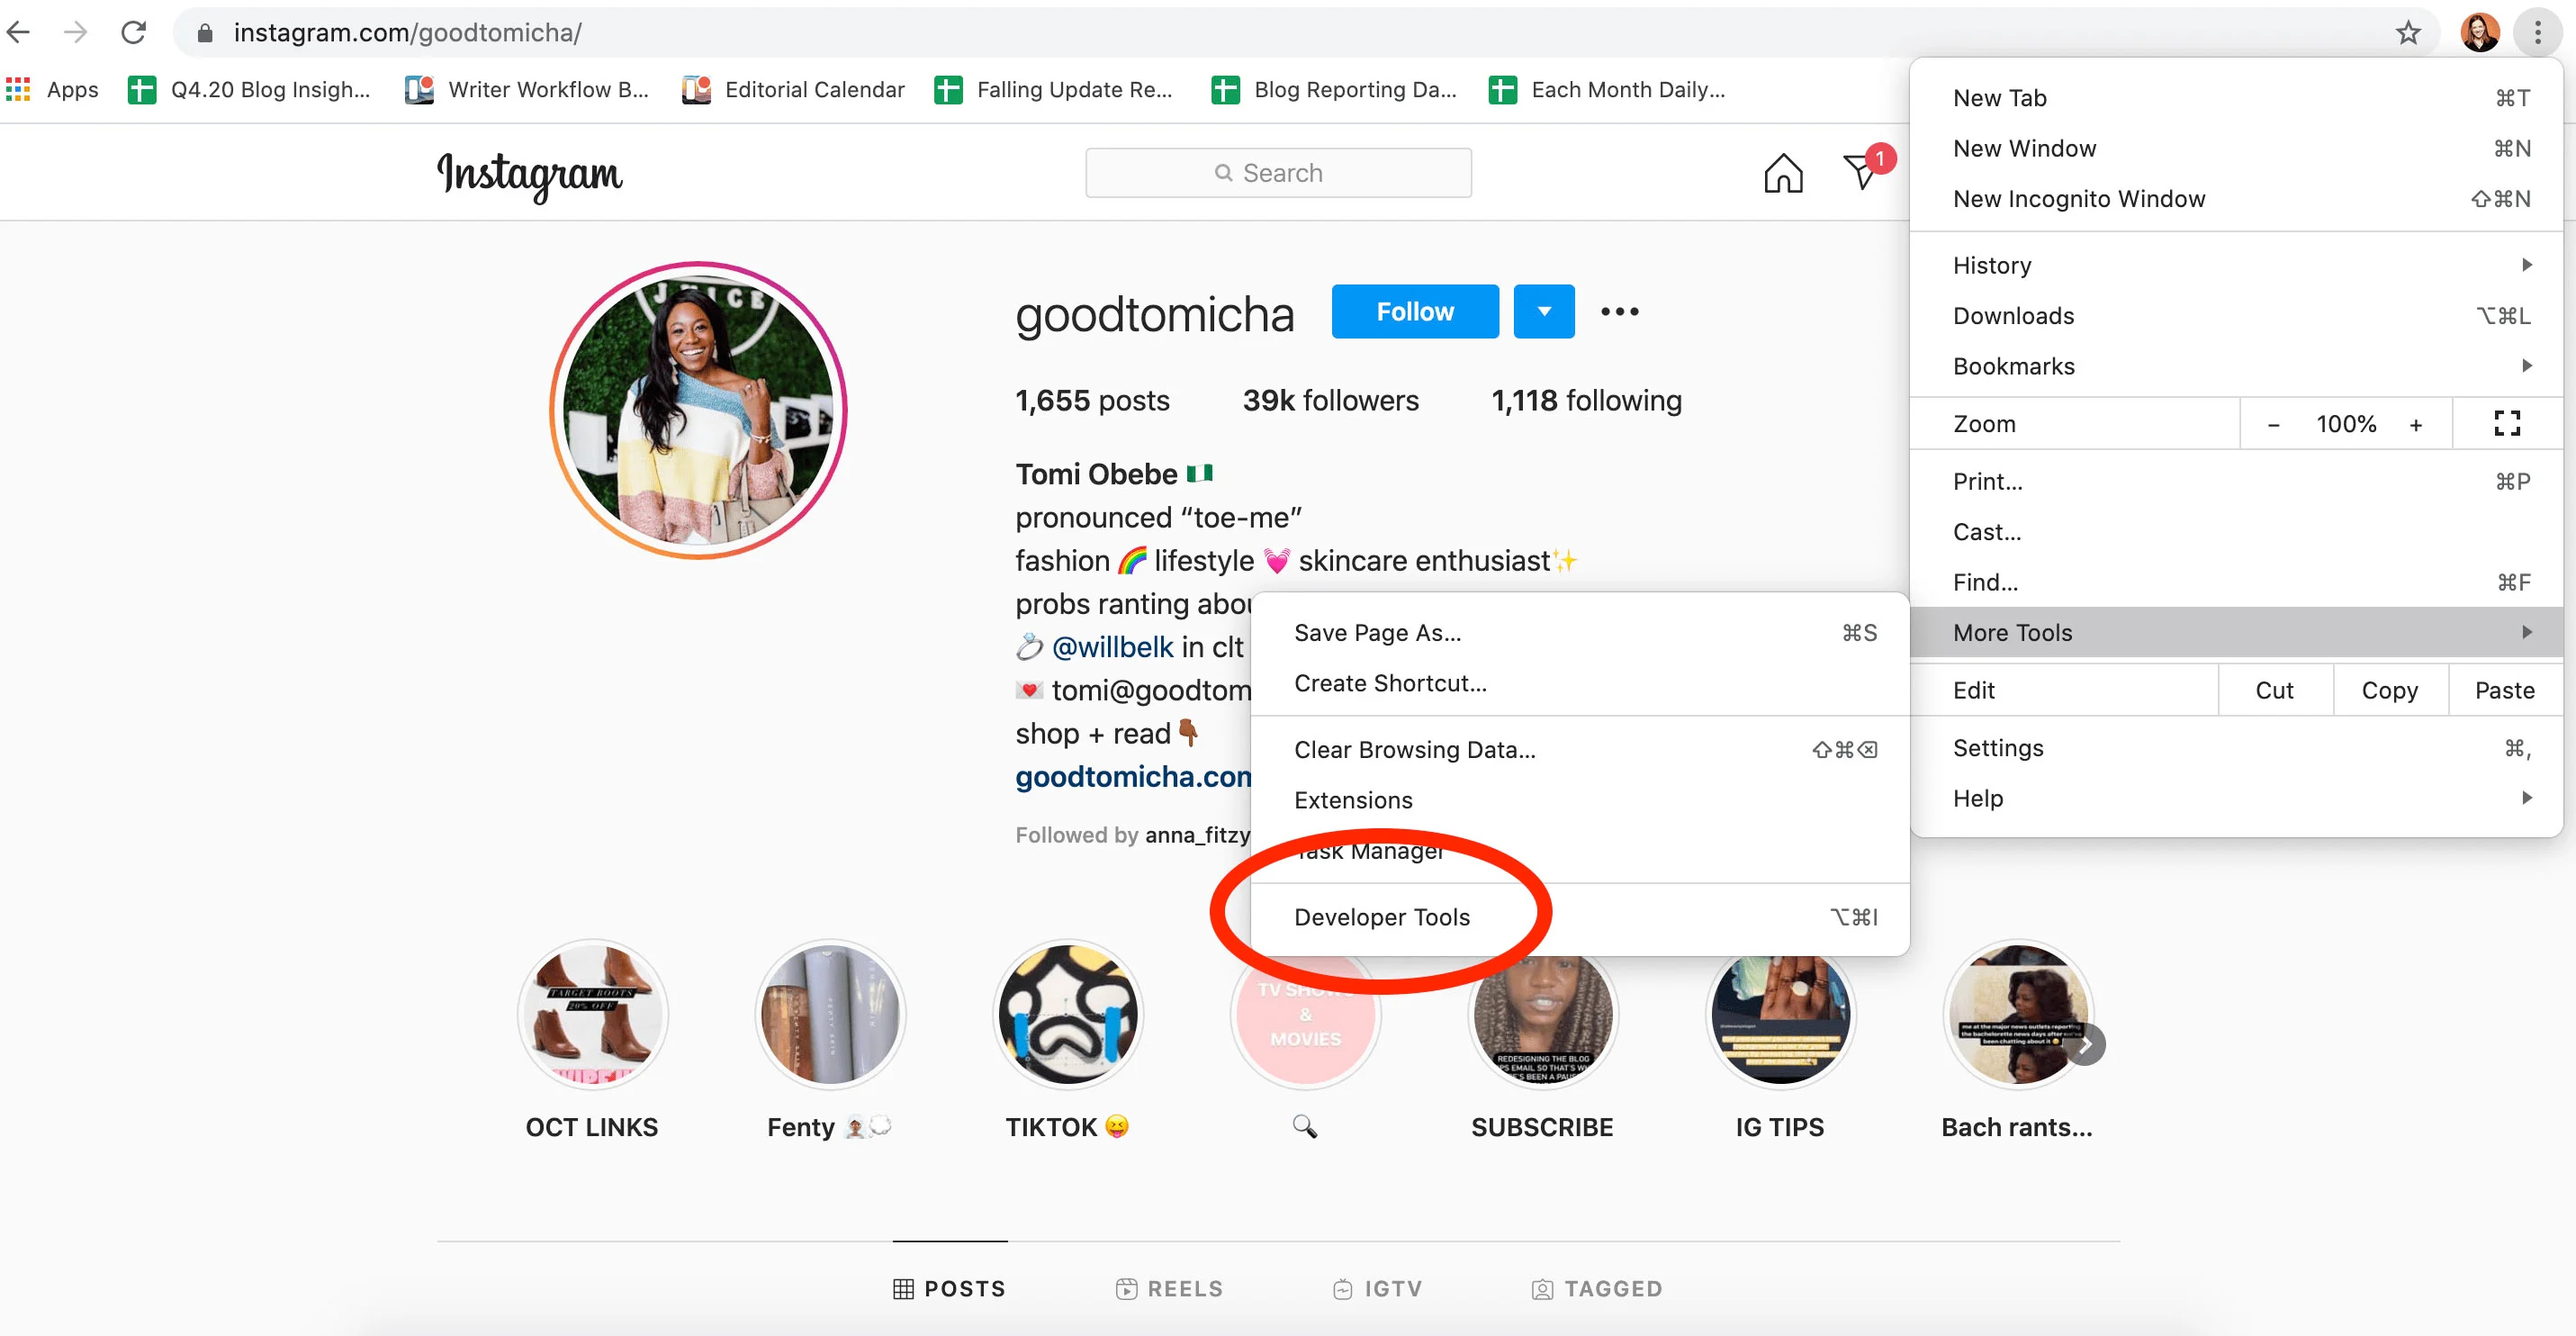
- Open the settings of your browser window by clicking on the three dots at the top right corner.
- Click on More Tools and then click on the Developer’s Tools.
- It will redirect you to the window’s developer screen for Chrome.
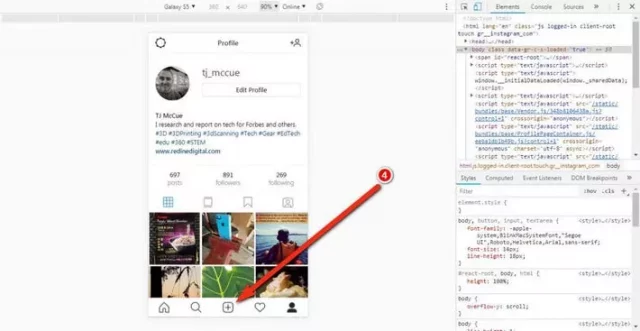
- Tap on the mobile button and then select the mobile interface as per your needs.
- Refresh your tab once you have selected the desired mobile interface, and then you will be able to post pictures and videos from your PC, just like your phone.
Note: You can upload multiple pictures, videos as well as a combination of both using this method.
Method 2: How To Post On Instagram Using MAC | Is It Any Different From A Windows System?
Note: You can upload pictures from MAC using the same steps as above if you are using Google Chrome on your MAC. However, if you are not, then we have an alternate method for you below.
- Open Mac’s default browser Safari and then log in to your Instagram profile.
- Click on the Preferences menu and then go to the Advanced section.
- Next to the menu bar, click on the Show Develop Menu in Menu Bar.
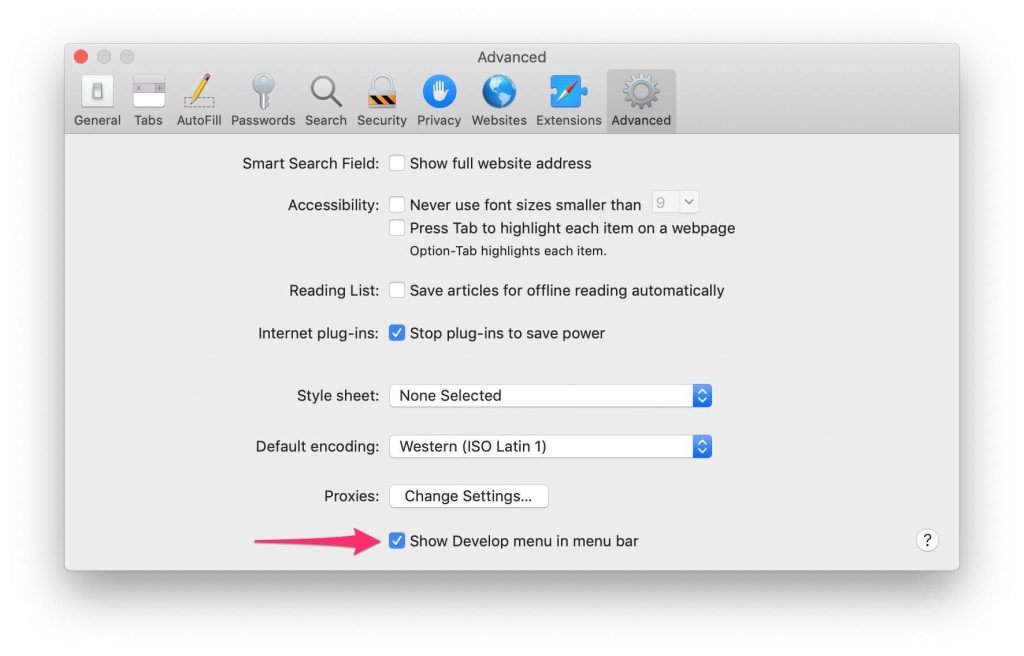
- It will redirect you to the Develop Menu, where you have to click on the User-Agent
- From here, you can choose the mobile interface you want to use on your Instagram.
- Next, your tab will be refreshed once, and then you are all good to upload pictures and videos from your Mac.
Also, Read | 8 Proven Hacks to Increase Followers on Instagram
Method 3: How To Post On Instagram Using Third-Party Apps | Access Instagram On PC Easily!
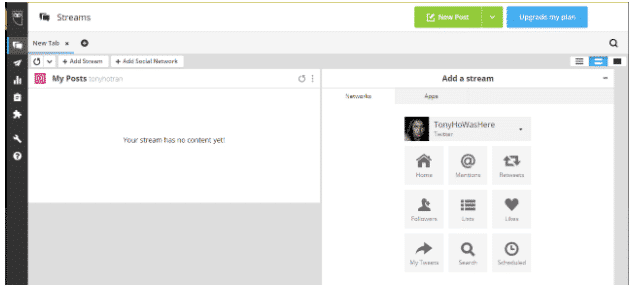
There are plenty of third-party apps available in the market that you can use in place of any browser when you are wishing to post on Instagram using your Mac or PC. Amongst the many apps available, there is one Hootsuite that you can use to access Instagram easily.
- First of all, if you don’t have a Hootsuite account, create one and then log onto your dashboard.
- Next, click on the New Post button present on your dashboard.
- You will be redirected to a new screen where you can select the Instagram account under Post To option.
- If you haven’t added an Instagram account, add your account by clicking on +Add a Social Network.
- Under the Media section, choose the pictures or videos that you want to upload. You can select multiple photos and videos at the same time as well.
- Using the Hootsuite Photo editor, you can even enhance your selected photos and videos.
- Once done with the editing, add your favorite caption using the Text section and also add a location if you wish to.
- After performing the above steps, click on the Post now option, and voila, your Instagram post is uploaded.
Method 4: How To Post On Instagram Using Creator Studio | Create, Schedule & Post!
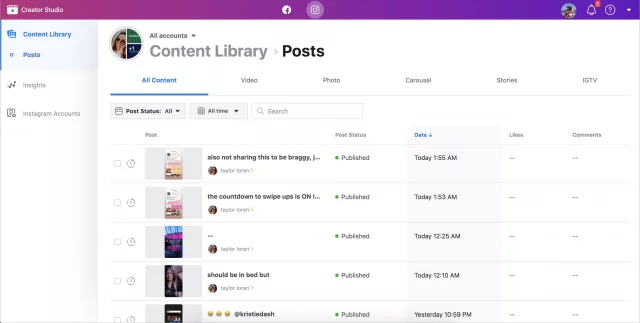
If you have all your social media accounts connected through a single dashboard then you will have no issues with using your Instagram account on PC or laptop. You can easily use the Creator Studio and post pictures on Instagram with a single click.
- The first step is to ensure that you are already connected to your Instagram account in Creator Studio.
- Go to the Instagram section and select Create Post.
- Then navigate the cursor to your Instagram feed and select one account, if you have logged in to multiple.
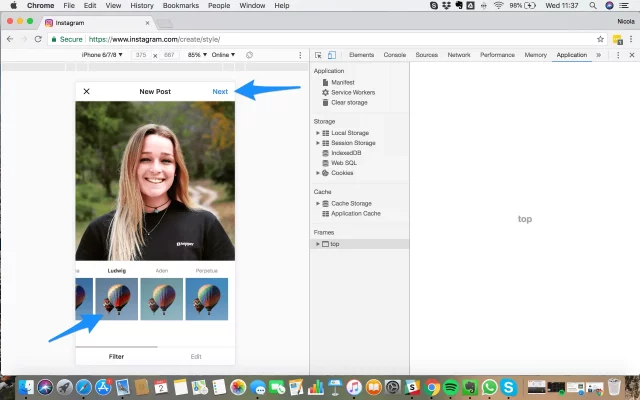
- Type the caption for your picture and edit the picture (optional)
- Select Add Content to post the picture.
- On next step, you can either select From File Upload to post new content or you can select From Facebook Page to share content you have already posted.
- If you want to share the picture on your Facebook account as well, select and check the dialog box that is under Post to Facebook option.
- Once you are done with everything, select Publish.
Method 5: How To Post On Instagram Using A Scheduler | Schedule Your Content In Advance!
Alternatively one of the easiest methods on our list is to schedule Instagram posts. You can always use a scheduler and plan your feed well in advance to avoid any errors later. There are many schedulers available that make the task easy for you.
However, we suggest using one that also has an auto-publish feature to post your content without any push notifications. One such Instagram Scheduler is provided by Later.
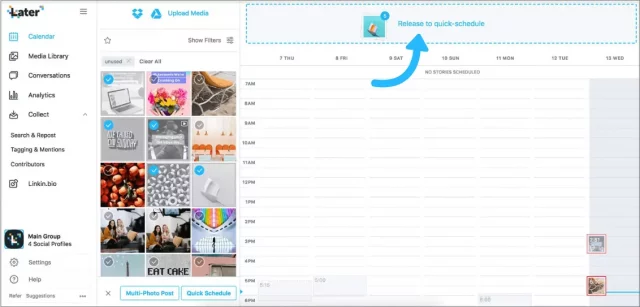
- The very first step is to upload all your pictures and other video content to Later’s Media library.
- You can categorize your content using different labels to make finding them easy for you later.
- Next step is to schedule your content on a weekly or monthly basis.
- Open the calendar and then select the week tab then double-click on the timeslot as per your preference.
- Drag your content from the library and drop them on the calendar.
- Now that you have scheduled your posts, you can easily plan your Instagram feed before time for a better engagement.
- If you have a business account, you can enable the auto publish feature that will upload your content easily from a PC or Mac system without the need to check push notifications.
Method 6: How To Upload IG Story From Desktop Or MAC? Follow A Few Simple Steps!
Use the following steps to upload an Instagram story using your PC or Mac easily.
- First, open the Instagram Login page on your browser and open your account.
- Go to the developer mode on your browser using the steps mentioned above in the first method.
- Next, click on the camera icon in the top left corner.
- Choose any picture or video that you want to be added to your Instagram story.
- If you wish to edit your stories using filters, or stickers, and gifs, you can do that as well.
- When you are finally done, simply click on Add To Your Story at the bottom, and your story will be uploaded.
Method 7: How To Edit Instagram Post Using PC Or Mac | It’s A Simple Trick!
Note: First of all, upload a picture using the steps mentioned for PC and Mac, which will give you access to the developer mode. After that, follow the steps below to edit your Instagram post.
- Once have access to Developer Mode, follow the steps to edit Instagram post on desktop.
- Click on the three dots present at the top right corner
- Next, click on the edit option
- Edit the Post however you want using hashtags, captions, or tags.
- When you are satisfied with the editing, click on the Blue Check Mark to update the Post.
Method 8: How To Delete Instagram Post Using PC Or Mac | Make No Room For Mistakes!
Follow the steps below to easily delete an Instagram post using your PC or Mac.
- Log in to your Instagram account using a browser that suits you the best.
- Next, click on the Post that you wish to delete.
- After that, go to the developer mode of your browser using the steps mentioned above.
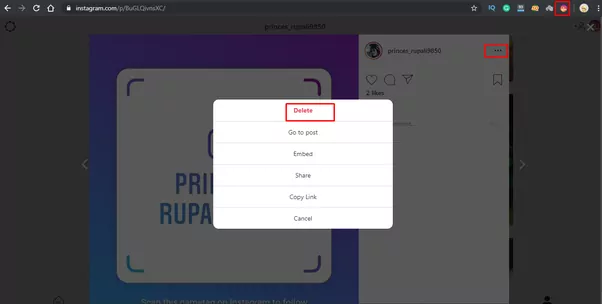
- Next, click on the three dots present at the top right corner.
- After that, click on Delete.
- Once you confirm to delete the Post, it will be done in a few seconds.
Final Words:
So, this was how to post on Instagram from PC in 2022. Choose whatever method works the best and you’ll be good to go. Also, you can take a little help from us if you feel stuck while posting Instagram content using your laptop. The process may feel a little tough in the beginning but once you get the hang of it, everything will be quick and easy for you.